


2012 MERRY MAYHEM RULES & INFO
It’s time once again for Planet Calypso’s annual winter hunting extravaganza - Merry Mayhem! This year’s event features an expanded prize pool with new prizes - including valuable Calypso Land Deeds - new creatures, and updated rules. Running for 23 days over the Christmas holiday, Merry Mayhem is among the most exciting and popular events in all of Entropia Universe. So grab your best gear and join in the Mayhem!
Event Dates
- Dec 14: Competition opens at 00:00 UTC.
- Jan 06: Competition ends 23:59 UTC.
- Jan 18: Competition winners will be announced.
- Jan 30: The missions can be turned in to Carl Tucker.
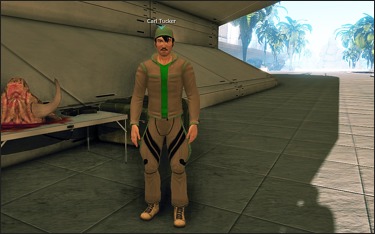 NPC Carl Tucker
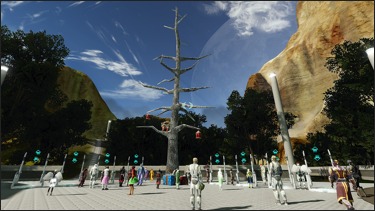 Merry Mayhem gates at Twin Peaks
Registration - You can register for the event by accepting either one or both Merry Mayhem missions offered by the NPC Carl Tucker, located near the Port Atlantis marina at the following map coordinates: 61421 x 75105, Eudoria. Registration opens on December 14 and will remain open until the event is finished. Note that there are two separate missions: one mission for the solo event and one mission for the team event.
Do not abandon the Merry Mayhem missions! If you do abandon a Merry Mayhem mission, all event points accumulated up to that time will be lost and will be unable to be replaced.
After you have registered, you will then need to proceed to Twin Peaks,� where you will find the gate entrances to the Merry Mayhem dungeon arenas. Be sure to enter the correct gate of your category.
Categories - The event offers several different competition categories to accommodate players of varying profession levels. Players will be sorted into one of the following four categories upon accepting the Mayhem missions.
- Category 1: Highest Professional Standing 0-24
- Category 2: Highest Professional standing 25-49
- Category 3: Highest Professional standing 50-69
- Category 4: Highest Professional Standing 70 or higher
Important Note - If during the course of the event you gain enough skills to move into the next category, you will no longer be able to enter the team instance arenas using your old keys (solo participants will not be affected). To continue participating or assisting in a team instance in such a case, you will need to chip out enough combat skills to bring your highest profession level below the effective category criteria.
Participation - When you accept the solo Mayhem mission, you will automatically be placed in the appropriate category and you will receive a stack of keys, each of which entitles you to one hour of gameplay in one of the solo Merry Mayhem instances. The portals to the Merry Mayhem instances are located in Twin Peaks, just to the left of the main Service Center. You will receive 30 keys for the solo event and they will be flagged with your particular category.
If you wish to also participate in one of the team categories or assist someone else there, you will need to register for the team Mayhem mission, also available from the NPC Carl Tucker. While the solo keys only allow you to enter the solo instance specified in the key's name, the team keys allow you to access team instances of a level equal to that which your were assigned, along with all higher levels. Points toward the mission are gained by killing the special Merry Mayhem creatures found inside the instances. The Merry Mayhem prizes will be distributed based on the scoring ranks once the event is completed. Make sure to plan and spend your 30 instance hours wisely!
Important Note - Do not leave an instance once the 60 minute timer has started, or you may risk having problems reentering the instance, and risk losing hunting time in the Merry Mayhem event.
Mayhem Creatures
The Mayhem creatures assigned to each category are:
- Category 1 Team: Merry Mayhem Kerberos (T,1), Merry Mayhem Araneatrox (T,1)
- Category 2 Team: Merry Mayhem Kerberos (T,2), Merry Mayhem Araneatrox (T,2)
- Category 3 Team: Merry Mayhem Kerberos (T,3), Merry Mayhem Araneatrox (T,3)
- Category 4 Team: Merry Mayhem Kerberos (T,4), Merry Mayhem Araneatrox (T,4)
- Category 1 Solo: Merry Mayhem Kerberos (S,1), Merry Mayhem Araneatrox (S,1)
- Category 2 Solo: Merry Mayhem Kerberos (S,2), Merry Mayhem Araneatrox (S,2)
- Category 3 Solo: Merry Mayhem Kerberos (S,3), Merry Mayhem Araneatrox (S,3)
- Category 4 Solo: Merry Mayhem Kerberos (S,4), Merry Mayhem Araneatrox (S,4)
Points will be awarded to players based on the difficulty of creatures killed:
1 x Point - Merry Mayhem Kerberos (T,1), (T,2), (T,3), (T,4), (S,1), (S,2), (S,3), (S,4)
2 x Point - Merry Mayhem Araneatrox (T,1), (T,2), (T,3), (T,4), (S,1), (S,2), (S,3), (S,4)
We strongly recommend that you adjust your graphics settings and set shader quality to high or very high in order to make sure the lighting in the instances works properly.
Prizes
Prizes will be awarded to the players that accumulate the highest points within each category.
Prizes will be distributed as follows:
Teams
Category 1 Team
1. MM Shins + 2 x Tripudion DNA Sample + Hedoc Mayhem
2. MM Shins + 2 x Cornudos DNA Sample + Isis Project Zero-Three
3. MM Shins + 2 x Foul DNA Sample
4. MM Shins + Hedoc Mayhem
5. MM Shins + 4 x Neurobiotic Booster A5 10mg
6. 1 x CLD + 4 x Neurobiotic Booster A5 10mg
7. 1 x CLD + 3 x Neurobiotic Booster A5 10mg
8. 1 x CLD + 2 x Neurobiotic Booster A5 10mg
9. 1 x CLD + 1 x Neurobiotic Booster A5 10mg
10. Item Naming Rights - Sword
15. Hedoc Mayhem
20. 1 x CLD
25. 1 x Neurobiotic Booster - A5 10mg
50. 1 x Neurobiotic Booster - A5 10mg
Category 2 Team
1. MM Shins + 2 x Snarg DNA Sample + Adjusted Hedoc Mayhem
2. MM Shins + 2 x Mermoth DNA Sample + CalyTrek CR Spirit MK.I
3. MM Shins + 2 x Equus DNA Sample
4. MM Shins + Hedoc Mayhem
5. MM Shins + 4 x Neurobiotic Booster A5 10mg
6. 1 x CLD + 4 x Neurobiotic Booster A5 10mg
7. 1 x CLD + 3 x Neurobiotic Booster A5 10mg
8. 1 x CLD + 2 x Neurobiotic Booster A5 10mg
9. 1 x CLD + 1 x Neurobiotic Booster A5 10mg
10. Item Naming Rights - BLP Pistol
15. Hedoc Mayhem
20. 1 x CLD
25. 1 x Neurobiotic Booster - A5 10mg
50. 1 x Neurobiotic Booster - A5 10mg
Category 3 Team
1. MM Shins + 2 x Nexnecis DNA Sample + Improved Hedoc Mayhem
2. MM Shins + 2 x Gokibusagi DNA Sample + Omegaton M83 Predator
3. MM Shins + 2 x Mourner DNA Sample
4. MM Shins + Adjusted Hedoc Mayhem
5. MM Shins + 4 x Neurobiotic Booster A5 10mg
6. 1 x CLD + 4 x Neurobiotic Booster A5 10mg
7. 1 x CLD + 3 x Neurobiotic Booster A5 10mg
8. 1 x CLD + 2 x Neurobiotic Booster A5 10mg
9. 1 x CLD + 1 x Neurobiotic Booster A5 10mg
10. Item Naming Rights - BLP Rifle
15. Hedoc Mayhem
20. 1 x CLD
25. 1 x Neurobiotic Booster - A5 10mg
50. 1 x Neurobiotic Booster - A5 10mg
Category 4 Team
1. MM Shins + 2 x Osseocollum DNA Sample + Modified Hedoc Mayhem
2. MM Shins + 2 x Scaboreas DNA Sample + DOA Slugstorm
3. MM Shins + 2 x Itumatrox DNA Sample
4. MM Shins + Adjusted Hedoc Mayhem
5. MM Shins + 4 x Neurobiotic Booster A5 10mg
6. 1 x CLD + 4 x Neurobiotic Booster A5 10mg
7. 1 x CLD + 3 x Neurobiotic Booster A5 10mg
8. 1 x CLD + 2 x Neurobiotic Booster A5 10mg
9. 1 x CLD + 1 x Neurobiotic Booster A5 10mg
10. Item Naming Rights - Teleporter
15. Hedoc Mayhem
20. 1 x CLD
25. 1 x Neurobiotic Booster - A5 10mg
50. 1 x Neurobiotic Booster - A5 10mg
Solo
Category 1 Solo
1. MM Shins + 1 x Tripudion DNA Sample + Hedoc Mayhem
2. MM Shins + 1 x Cornudos DNA Sample
3. MM Shins + 1 x Foul DNA Sample
4. MM Shins + Hedoc Mayhem
5. MM Shins + 4 x Neurobiotic Booster A5 5mg
6. 1 x CLD + 4 x Neurobiotic Booster A5 5mg
7. 1 x CLD + 3 x Neurobiotic Booster A5 5mg
8. 1 x CLD + 2 x Neurobiotic Booster A5 5mg
9. 1 x CLD + 1 x Neurobiotic Booster A5 5mg
10. Item Naming Rights - Knife
13. Isis Project Zero-Three
15. Hedoc Mayhem
25. 1 x CLD
50. 1 x Neurobiotic Booster - A5 5mg
75. 1 x Neurobiotic Booster - A5 5mg
Category 2 Solo
1. MM Shins + 1 x Snarg DNA Sample + Adjusted Hedoc Mayhem
2. MM Shins + 1 x Mermoth DNA Sample
3. MM Shins + 1 x Equus DNA Sample
4. MM Shins + Hedoc Mayhem
5. MM Shins + 4 x Neurobiotic Booster A5 5mg
6. 1 x CLD + 4 x Neurobiotic Booster A5 5mg
7. 1 x CLD + 3 x Neurobiotic Booster A5 5mg
8. 1 x CLD + 2 x Neurobiotic Booster A5 5mg
9. 1 x CLD + 1 x Neurobiotic Booster A5 5mg
10. Item Naming Rights - Laser Pistol
13. CalyTrek CR Spirit MK.I
15. Hedoc Mayhem
25. 1 x CLD
50. 1 x Neurobiotic Booster - A5 5mg
75. 1 x Neurobiotic Booster - A5 5mg
Category 3 Solo
1. MM Shins + 1 x Nexnecis DNA Sample + Improved Hedoc Mayhem
2. MM Shins + 1 x Gokibusagi DNA Sample
3. MM Shins + 1 x Mourner DNA Sample
4. MM Shins + Adjusted Hedoc Mayhem
5. MM Shins + 4 x Neurobiotic Booster A5 5mg
6. 1 x CLD + 4 x Neurobiotic Booster A5 5mg
7. 1 x CLD + 3 x Neurobiotic Booster A5 5mg
8. 1 x CLD + 2 x Neurobiotic Booster A5 5mg
9. 1 x CLD + 1 x Neurobiotic Booster A5 5mg
10. Item Naming Rights - Laser Rifle
13. Omegaton M83 Predator
15. Hedoc Mayhem
25. 1 x CLD
50. 1 x Neurobiotic Booster - A5 5mg
75. 1 x Neurobiotic Booster - A5 5mg
Category 4 Solo
1. MM Shins + 1 x Osseocollum DNA Sample + Modified Hedoc Mayhem
2. MM Shins + 1 x Scaboreas DNA Sample
3. MM Shins + 1 x Itumatrox DNA Sample
4. MM Shins + Adjusted Hedoc Mayhem
5. MM Shins + 4 x Neurobiotic Booster A5 5mg
6. 1 x CLD + 4 x Neurobiotic Booster A5 5mg
7. 1 x CLD + 3 x Neurobiotic Booster A5 5mg
8. 1 x CLD + 2 x Neurobiotic Booster A5 5mg
9. 1 x CLD + 1 x Neurobiotic Booster A5 5mg
10. Item Naming Rights - Teleporter
13. DOA Slugstorm
15. Hedoc Mayhem
25. 1 x CLD
50. 1 x Neurobiotic Booster - A5 5mg
75. 1 x Neurobiotic Booster - A5 5mg
**Prize Information**
Neurobiotic Boosters
Each Neurobiotic Booster A5 5mg consumable item increases skill gains in all professions by 50% after being consumed, and lasts for 5 hours of logged-in time. The timer is paused while the avatar who has consumed the booster item is logged out of Entropia Universe. Unconsumed booster items are non-tradable.
Each Neurobiotic Booster A5 10mg consumable item increases skill gains in all professions by 50% after being consumed, and lasts for 10 hours of logged-in time. The timer is paused while the avatar who has consumed the booster item is logged out of Entropia Universe. Unconsumed booster items are non-tradable.
Mayhem Hedocs
Hedoc Mayhem (when maxed):
Heal interval: 37.5-50.0
Uses per minute: 28
Decay: 0.05350 PED
Skill requirement: 16-23
Average heal per sec: 20.4
Average heal per pec: 8.2
Adjusted Hedoc Mayhem (when maxed):
Heal interval: 39.8-53.0
Uses per minute: 35
Decay: 0.05000 PED
Skill requirement: 18-22
Average heal per sec: 27.0
Average heal per pec: 9.3
Improved Hedoc Mayhem (when maxed):
Heal interval: 93.0-124.0
Uses per minute: 38
Decay: 0.08000 PED
Skill requirement: 26-30
Average heal per sec: 68.7
Average heal per pec: 13.6
Modified Hedoc Mayhem (when maxed):
Heal interval: 124.5-166.0
Uses per minute: 40
Decay: 0.08000 PED
Skill requirement: 33-38
Average heal per sec: 96.8
Average heal per pec: 18.2
Best of luck to everyone participating in the year's Merry Mayhem, and the Planet Calypso and MindArk staffs wish each and every Entropia Universe participant a happy and healthy holiday season!
